Building a digital consent form
Module 2
Let’s Do Digital Team
Lesson 2 - Let’s build a digital consent app
Eager to get started?
- Don’t worry, we will get you coding soon.
- However, it is probably a good idea to make sure you are familiar with all of the concepts you need to build a
digital consent form.
So what are we going to build exactly?
- A web based digital healthcare app.
- This needs both a frontend and a backend.
- Frontend - what you see and interact with.
- Backend - the brains (in most cases) and data storage of your app.
What is a web browser?
- You highly likely use these every day (Explorer, Chrome, Safari).
- A web browser is a software program that allows a user to locate, access, display and interact with a web page.
- The main languages used in creating the “raw” webpage are HTML and javascript.
- You can use frameworks in other languages to then create these “raw” webpages. In our case a python framework called
streamlit.
We are going to cheat
- As we do not have time to build both the front and backend, we have created a cloud database (specifically
suprbase) for you to connect to. - The “brains” and frontend delivery will be managed by the
streamlitserver that you will be building. - A server is basically a computer program that provides you with a web page.
What is a library?
- You will be using different libraries in this build.
- A library is basically a collection of code that provides set functionality.
- You need to first
installlibraries and thenimportto use them. - See module 1 for an overview.
What is an API?
- An
application process interface(API) is a means for computer programs to communicate with each other. - These communicating programs can be on the same computer, over networks or even the internet.
- You will be using the
supabase python libraryto connect to thesupabase databasevia itsAPI.
Data in a database
- Much like a spreadsheet, data is stored in a database in
tables. - You
querytables in the database to get data. - Queries in streamlit return all data from a table.
- You can then use standard python data manipulation to retrieve the data you need.
State
Statein a web app is basically the current values of variables being used.- Will we cover this shortly and how to read and alter state in Streamlit.
Fields
- A field on a web page is an element that you can interact with and input data.
- Common types of fields include text boxes, radio buttons, checkboxes, dropdown menus, and buttons.
- Fields are typically used in
formsto collect user input.
Fields - some key facts
- There are many different attributes that you can alter for each field on a webpage. These include:
- labels - the label you see on the web page.
- keys - how you reference a field in code.
- on_change - a function to run when the value of a field changes.
Web Page Forms
- A form on a web page is a structured area that contains fields for users to input and submit data.
- Forms are used to collect user input and can include various types of fields.
- The data entered into a form can be sent to a server for processing, often by pressing a submit button.
Python specific concepts
Anatomy of a function
Scope
- In most programming languages, a variable has
scope. Scopedefines where a variable can be read and altered.Scopeis determined by where a variable was originally defined.
Scope example
scope.py
Output
    Patient Name: Alice Smith
    Traceback (most recent call last):
        File "/scope.py", line 6, in <module>
            print(patient_name)
                  ^^^^^^^^^^^^
    NameError: name 'patient_name' is not defined.
Bad practice
- You can use the global keyword to get variables into scope, but this is bad practice and best avoided.

Good practice
- Instead, pass all the variables you need to classes and functions as arguments.
- This also makes it much easier to problem solve and test your code later.

Negative indexing
- If you want to get the last element in a list, just use
-1
negative_indexing.py
Output
The last patient is: DavidList comprehension
- A quick way to build new lists from other lists or even dictionaries.
- Can take some time to get used to using these.
[new_element for item in iterable if condition]
List comprehension
list_comprehension.py
Output
[38.5, 39.0, 39.5]List comprehension - dictionaries
list_comprehension.py
Output
AliceConvert to list
- Sometimes you need to convert keys of a dictionary to a list:
list_function.py
Output
['name', 'hospital_number', 'age']I want it all
- The
all()function returns true if all elements in a list pass a certain test.
all(condition for item in iterable)
I want it all
all.py
Output
TrueI want all values
all.py
OUTPUT
okLambda
- We can use lambda to return a reference to a function rather than directly calling the function.
- It is useful when you want to pass a function with its own arguments as an argument to another function.
Streamlit
Streamlit
- As said, we will be using a python web app framework called
Streamlitfor the frontend. - Frameworks are a superset of libraries.
- Frameworks are great, as someone else has done most of the heavy coding to make it easier for you to carry out a task (in this case building a web app).
Module import
Direct import
or as an alias
Who is running what?
- Checks if the current file is being run as an imported library or directly.
Streamlit methods
streamlit_methods.py
import streamlit as st

# A title for the page
st.title("My first web app")

# Writes text to the browser
st.write("Text to write to browser")

# Text input field with key and on_change function
# "key_1" is stored as a key in the session state (described later)
st.text_input("label", key="key_1", on_change=lambda:on_change_function())

# Or, assign the input field results to a variable
hospital_number = st.text_input("Hospital number", "0", disabled=False)
Streamlit methods
streamlit_methods.py
Streamlit methods
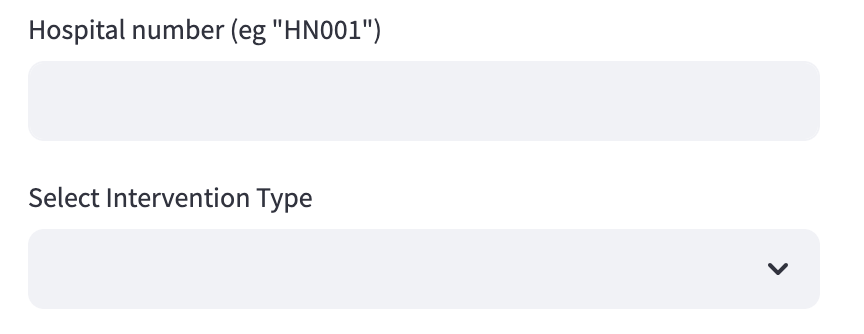
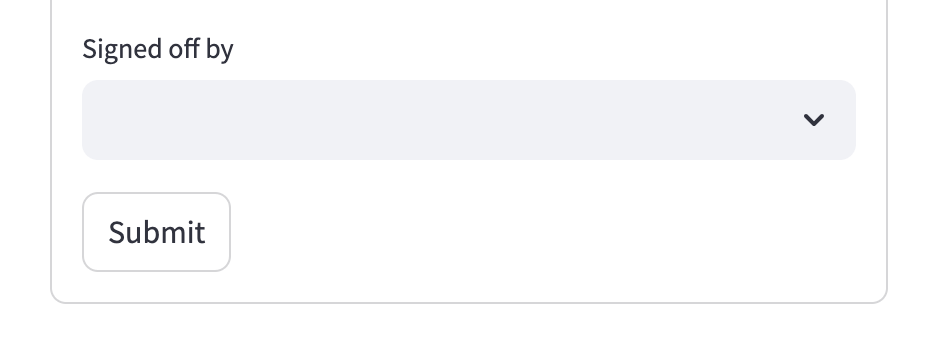
Streamlit methods - forms
Streamlit methods - forms
- Note the curved border around Streamlit forms.
Streamlit methods - change page
Session state
magicEnabled = false
- We have turned off a feature in Streamlit that shows all of your code in the browser using:
Otherwise, the browser will be a little messy with all of your code visible.
(See .streamlit/config.toml file if interested)
Stopping a running program
CTRL - C
or
CMD - C
Nuances of Streamlit
- When you update code and save, click Always rerun (top right) in the browser to automatically refresh on code change.
- Sometimes you need to manually refresh the browser or even restart Streamlit to get certain codes changes to work (likely due to some error in the code).
- Streamlit.io reruns the whole script whenever you interact with the browser (eg click something, select something, type something, or press a button).
Nuances of streamlit
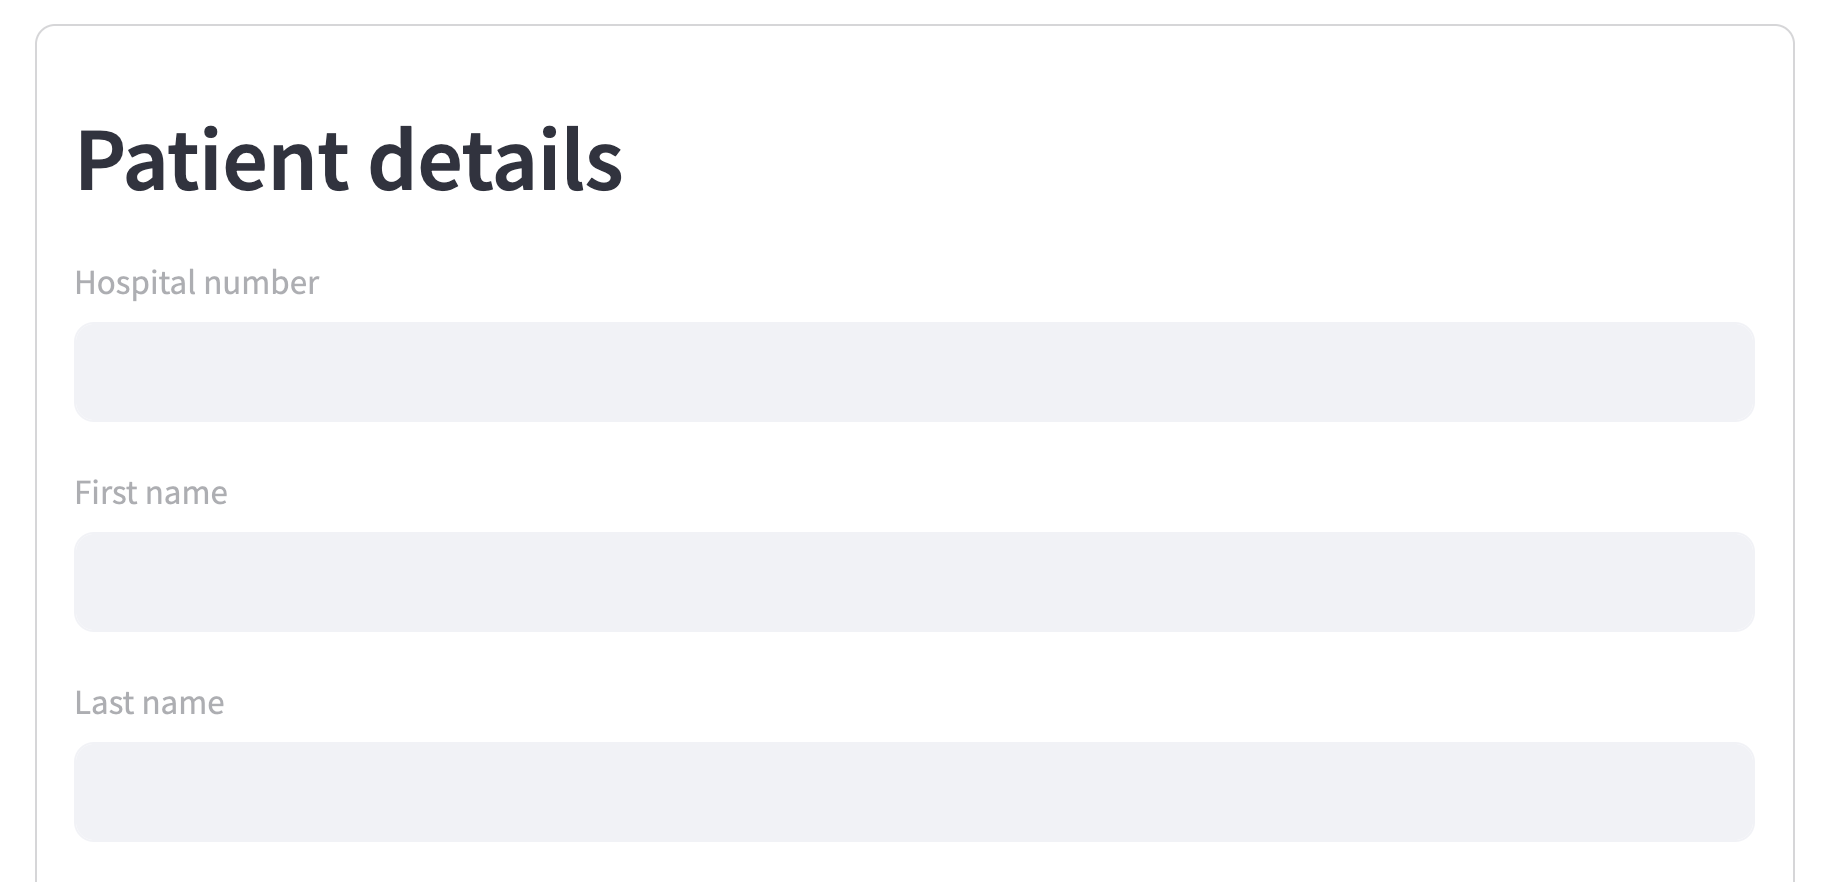
- Why the text field and selectbox outside of the form (in lesson 2)?
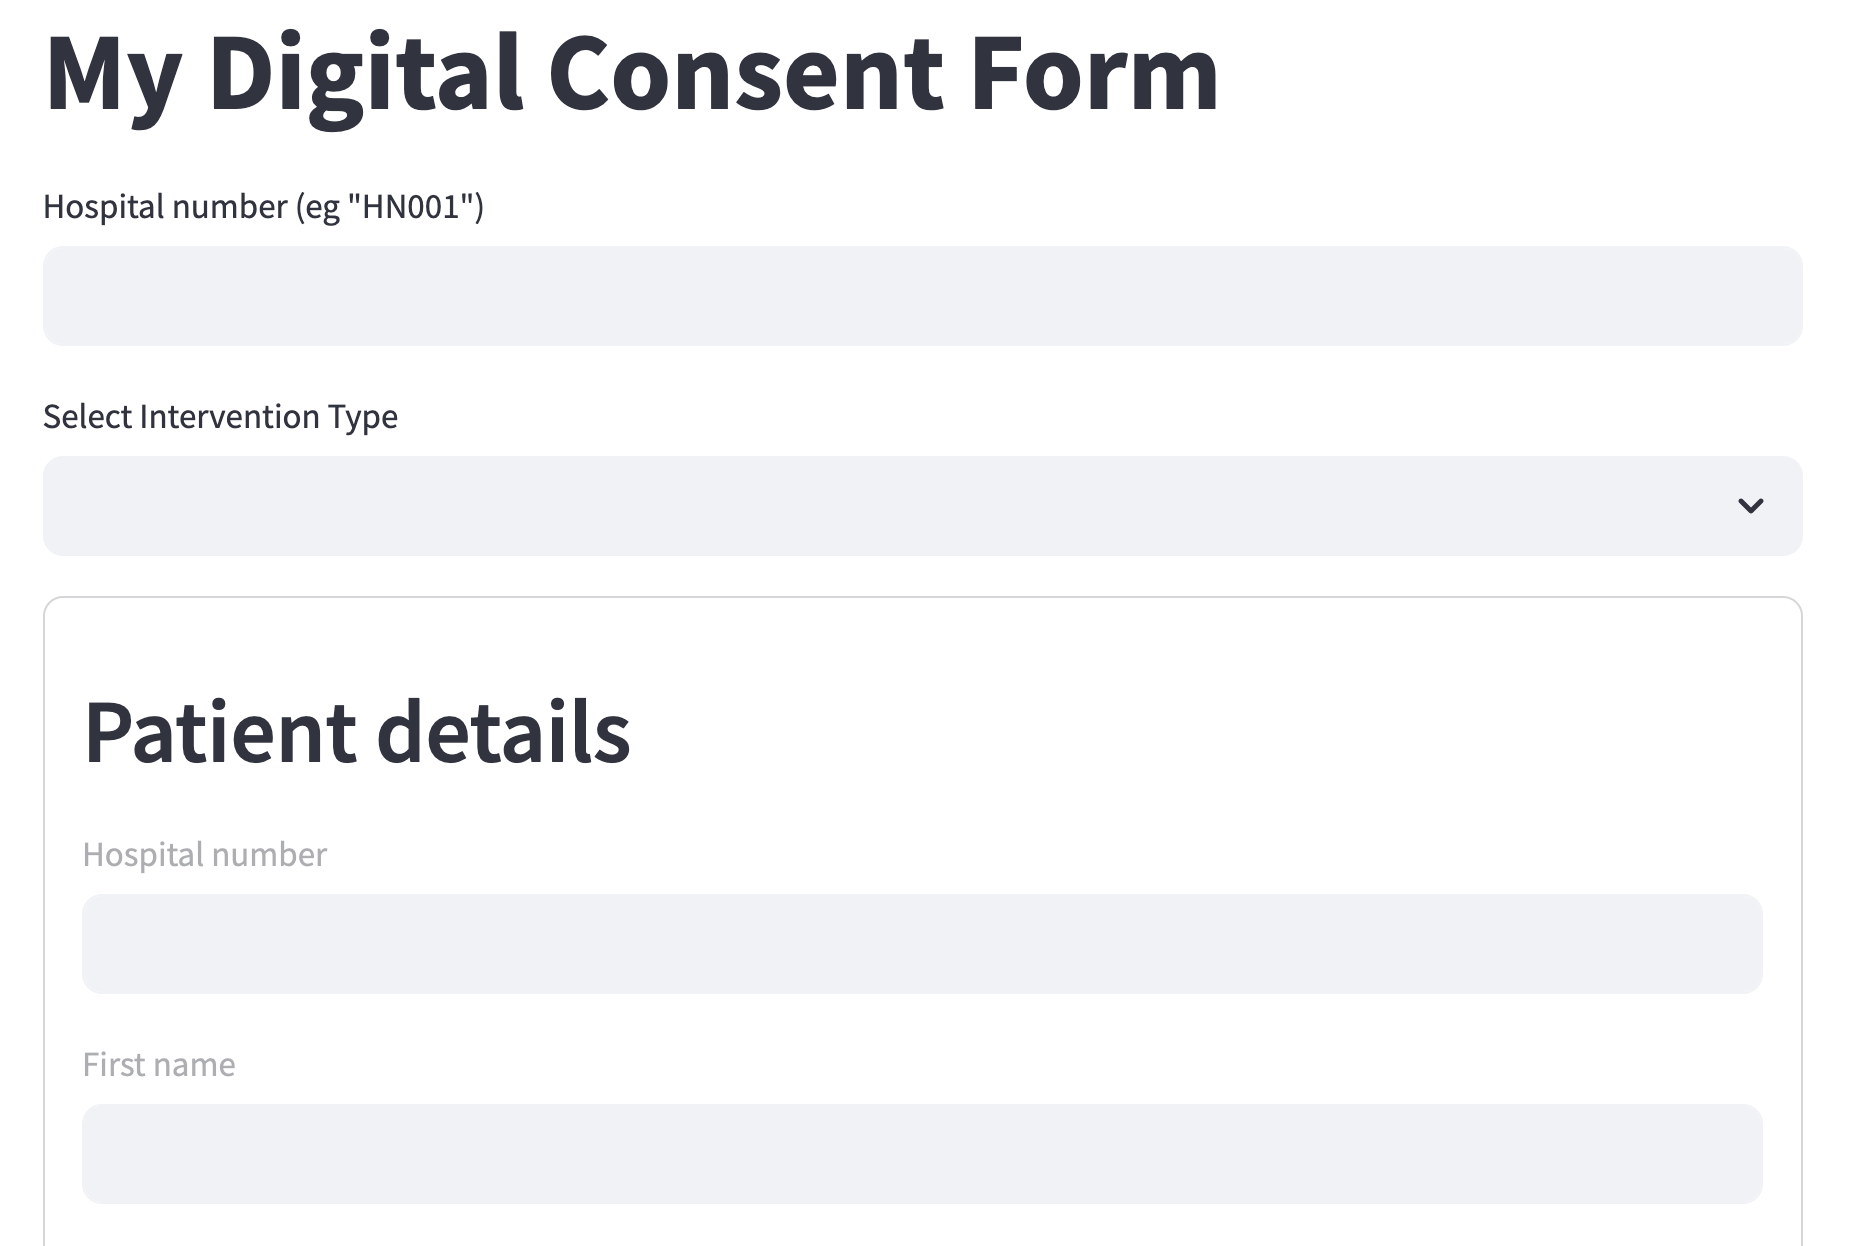
Nuances of streamlit
- Because Streamlit does not allow for dynamic update of fields within forms before submitting.
Supabase
Connection
- How to connect to the
Supabasedatabase and then query the data.
supabase.py
import streamlit as st
from st_supabase_connection import SupabaseConnection, execute_query

# Starts a connection to the cloud database on Supabase
conn = st.connection("supabase", type=SupabaseConnection)

# RETRIEVE data from database
users = execute_query(conn.table("users").select("*"), ttl="10m")

# ADD data to database
test_data = {"test_data": "Some test data"}
update_result = execute_query(
        conn.table("test_upload").insert([test_data], count="None")
    )
Database fields - test_upload
READ AND WRITE ACCESS
- id
- test_data
- created_at
Database fields - consent_types
READ ONLY
- id
- created_at
- type
- full_description
- intended_benefits
- potential_risks
Database fields - patient_demographics
READ ONLY
- id
- created_at
- first_name
- last_name
- hospital_number (HN001 - HN050)
- date_of_birth
Database fields - users
READ ONLY
- id
- created_at
- user_name
- first_name
- last_name
Database fields - submitted consents
READ AND WRITE ACCESS
- id
- created_at
- patient_id
- consent_type_id
- user_id
Now let’s get started
You need to have VS code installed
- Hopefully you have already installed the
VS Code IDEon your own personal machines. - You have 10 minutes to try and install VS code now if you have not done so already. If no luck, then we will get you to use the
Codespace IDEinstead.
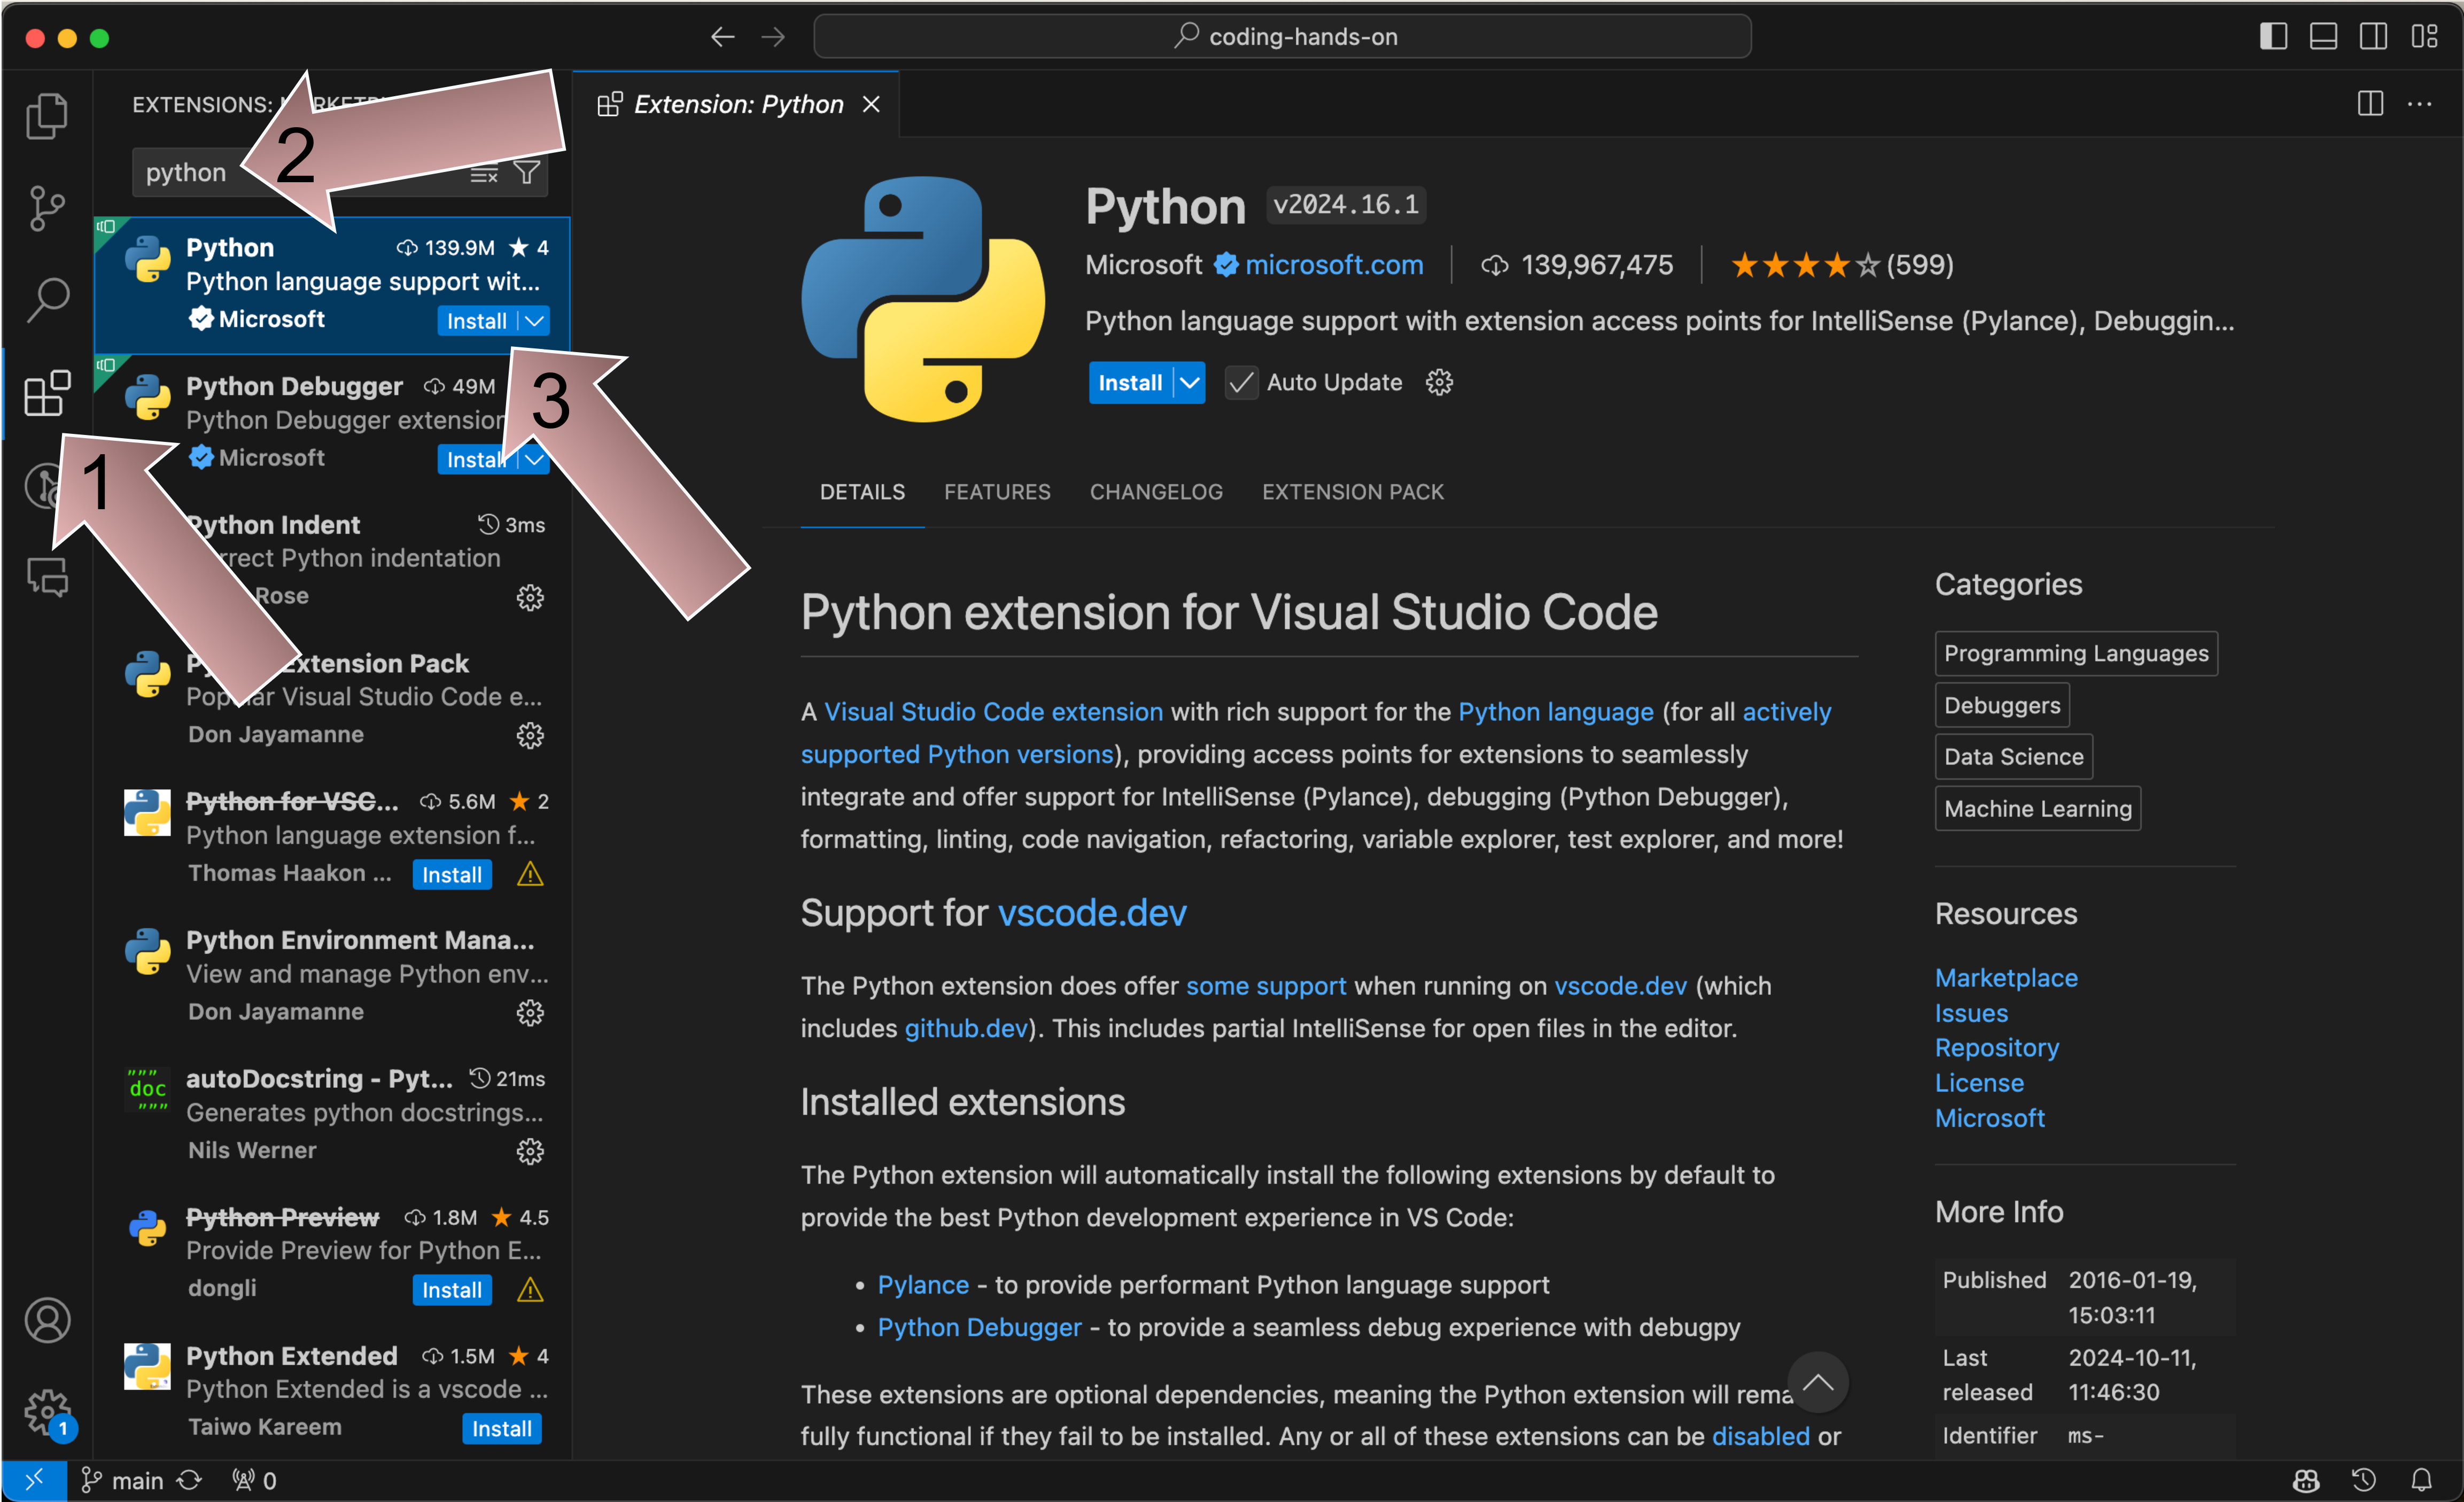
We need some extensions
- AKA Plugins.
- Add functionality and features, much like your favourite app store.
We need some extensions
- Python
- Black formatter
Python extension
Black formatter extension

Formatting
- You may notice strange line dropping in VScode when you save. This is the Black formatter making your code conform to standards.
- Black, as standard, makes code max 88 characters long, where possible.
Python must be installed
- You need to make sure you have python installed.
- This should be version 3 or above.
Get the code
- You need to clone (basically download) the code for the course from GitHub.
- Navigate your terminal to the folder where you want to save the course code in.
- Run the below code:
Virtual environments
- Needed to stop conflicts with different versions of python libraries across different projects.
- cd into your cloned repository (repo).
- You now need to create a virtual environment.
Activate
- And now activate the virtual environment.
Mac
Windows
Activate
- You should now see
(.venv)at the start of the command line to signify that you are in a python virtual environment.
Install libraries
and
and
Finding your way
- Click inside your terminal window.
- Go to:
Secrets
- To use the
Supabasecloud database, you need aURL(Uniform Resource Locator), eg website address and a secretkey. - This will then give you access to the the Supabase via its API.
- You will find the url and key in the HackMD file (shared during the module 2 session).
Secrets
- Create a copy of the .streamlit/secrets_example.toml file and rename it .streamlit/secrets.toml.
- Add the URL and API key from HackMD to this new file.
And then run
- And then run:
This will run
lesson_2.py
And…
Start the browser
- There will likely be a pop up window to start the browser.
- If not, press CTRL / CMD and click on one of the new url addresses in the terminal.

Follow the exercises.
- Now follow the instructions in the exercises, starting at exercise 1.
Altering the command to run
- Use the ← and → arrows to move the cursor on the terminal line (the mouse does not allow you to move the cursor). Then make any corrections with backspace and keystrokes as needed.
- For example to change
to
Warning!
- You are building an educational program. This is NOT to be used with real patients!
Have the slides on hand
- Make sure you have the slides on hand -
https://letsdodigital.org/learn/learn-python/module-2/ - You will need them as you build your digital consent form.
- We recommend doing small changes to your code, saving your work, and then checking to see what happens in the browser.
Ask
- Please please please ask questions of your tutor. That is why they are here.
There is no such thing as a stupid question, only a question left unanswered
Now go!
- Go join your breakout rooms again.
- You may find it frustrating when code does not work straight away. However this is how you learn. We have tried to make the exercises easy to follow and have provided you with great tutors to help you forwards.
- Getting errors? Try writing code in different ways to see if you can get it to work.
- Look up material in the slides.
- Worse case scenario, look at the answers, which are basically in the following exercise (but keep this cheat to last).
![]()